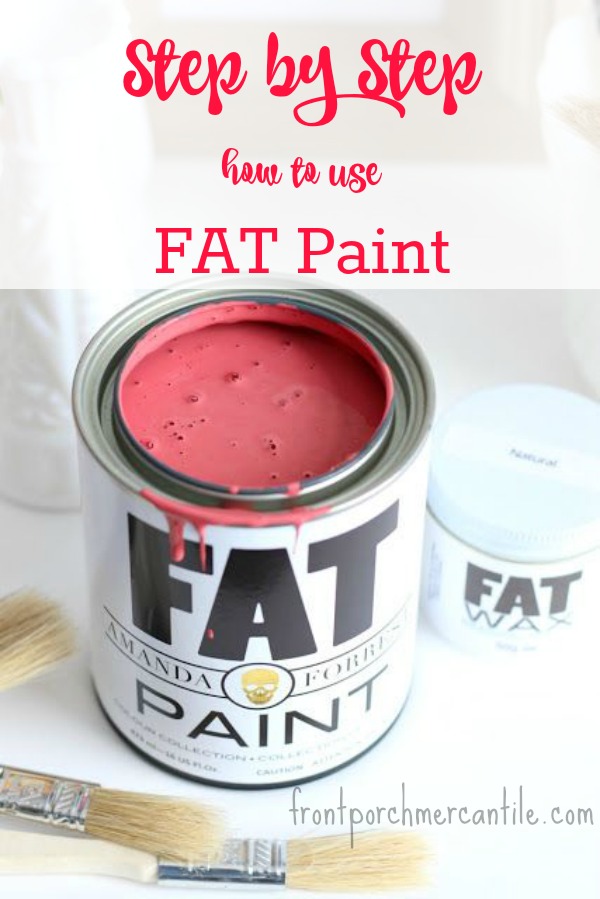
Easy Chalk Paint Tutorial
Wondering how easy it is to use Canadian made Fat Paint? Wondering how easy it is to use Canadian made Fat Paint? Can you really just take a piece of furniture and paint it? Yes, yes you can. EASY PEASY from drab to fab in no time with no fuss. Truly. In less than an…

Wondering how easy it is to use Canadian made Fat Paint?

Wondering how easy it is to use Canadian made Fat Paint?
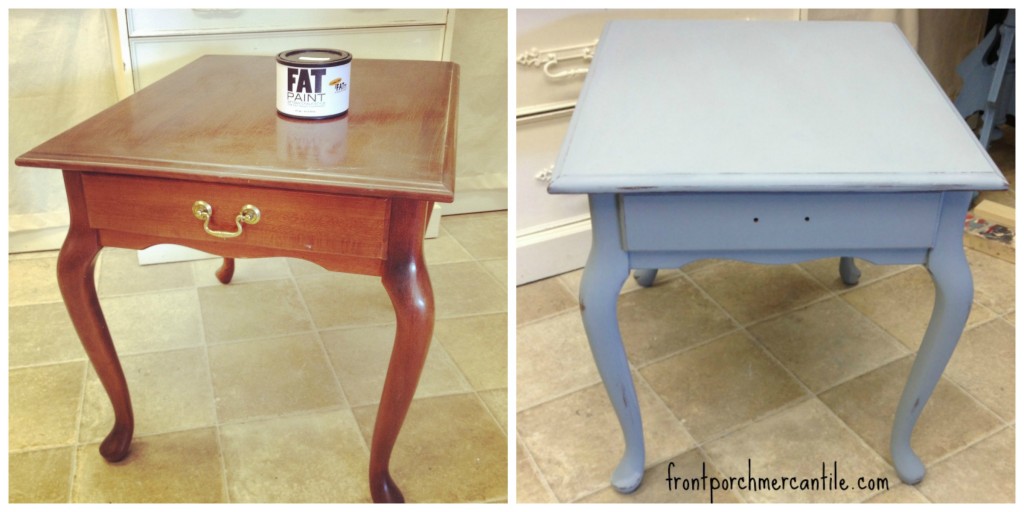
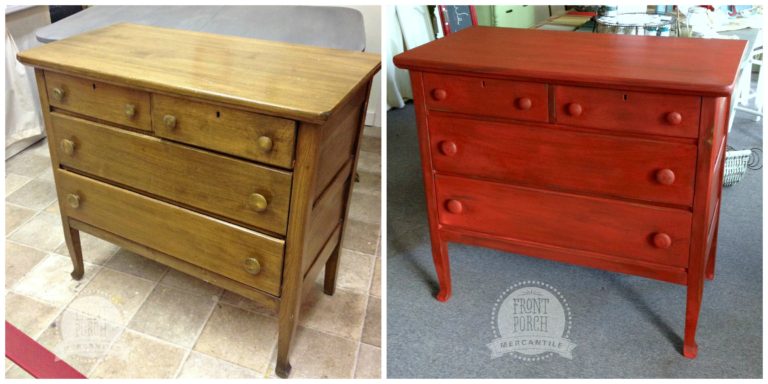
Can you really just take a piece of furniture and paint it? Yes, yes you can. EASY PEASY from drab to fab in no time with no fuss. Truly. In less than an hour and a half, this piece was transformed.
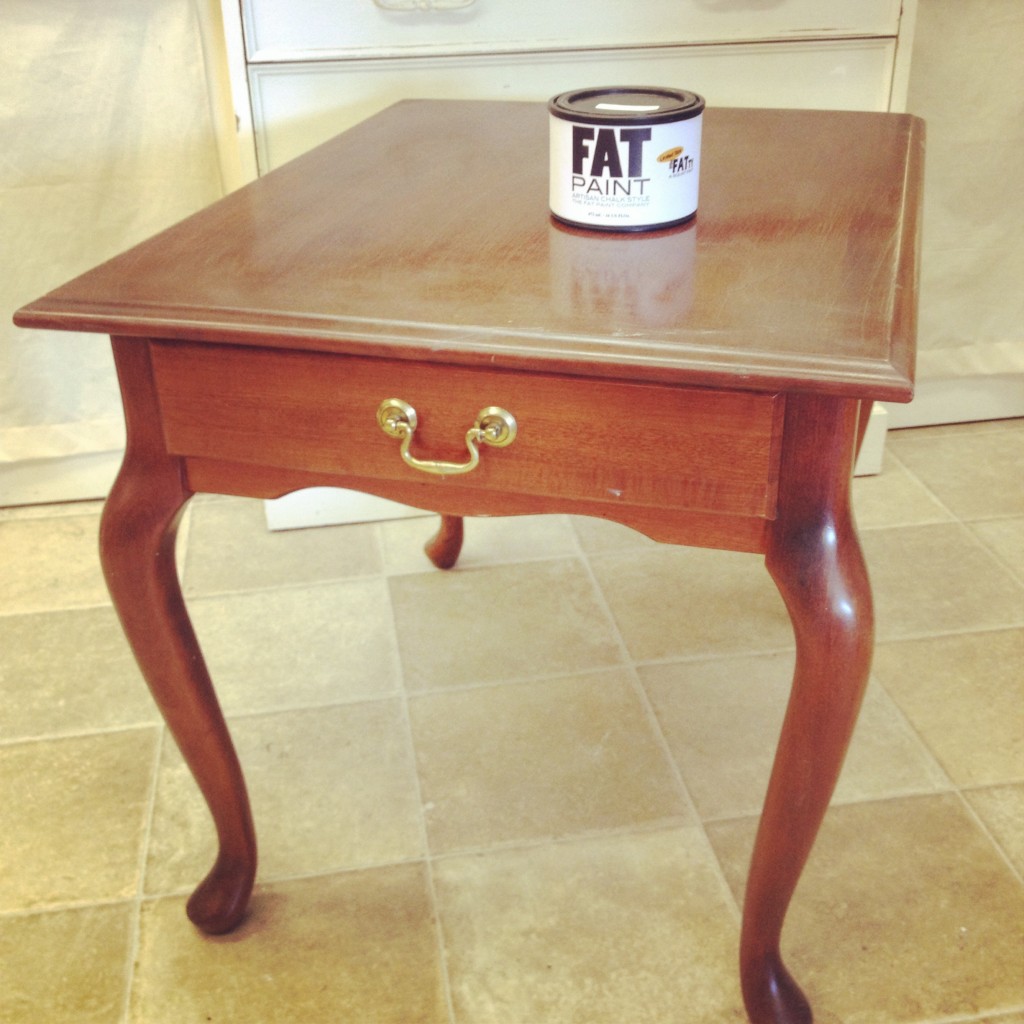
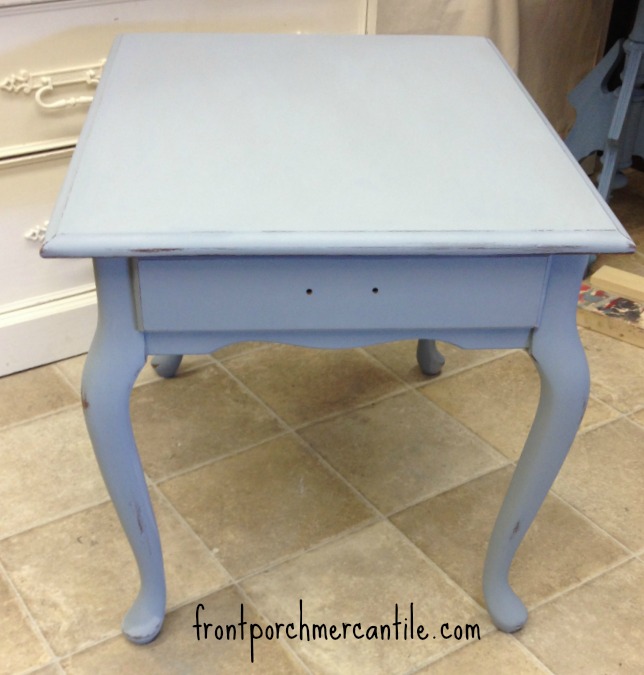
This little side table is solid wood (made in Maine) but was scratched and needed a little TLC and updating.
I thought she needed to be a little lighter and brighter, she needed to be restyled and re-loved with Fat Paint!
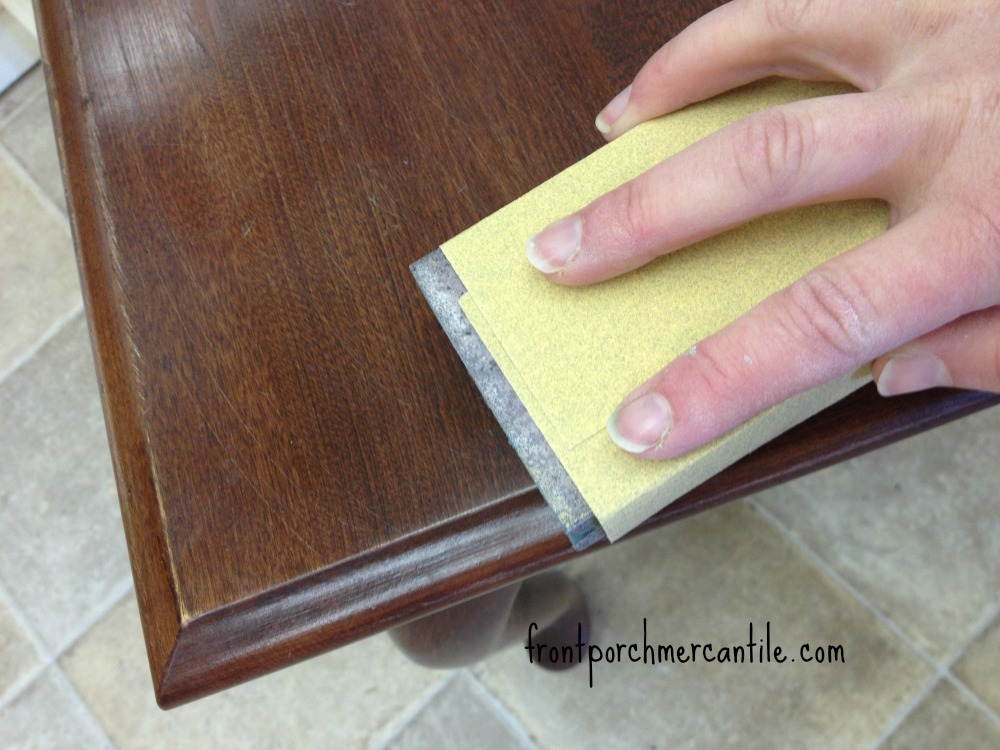
Step 1
First thing – quick scuff sand, just to give it a little “tooth”. This scuff sand took me all of 3 minutes using a sanding sponge and a quick sanding all over. You can skip this step in many cases, but I always do scuff sand just to be sure and it is so quick and easy.
TRY not to be blown away by the impressive manicure going on here ok?
Step 2
Cleaning! It is important to clean any furniture you are working on with any paint products, this piece appeared fairly clean, but it’s hard to tell if there is wax buildup etc, so I gave her a quick wash with Dawn soap and a good rinse. If I have a heavily soiled piece, I use a stronger degreaser like Spray 9, TSP and sometimes even a vinegar wash. Always make sure you rinse well. This step is also under 5 mins.
Step 3
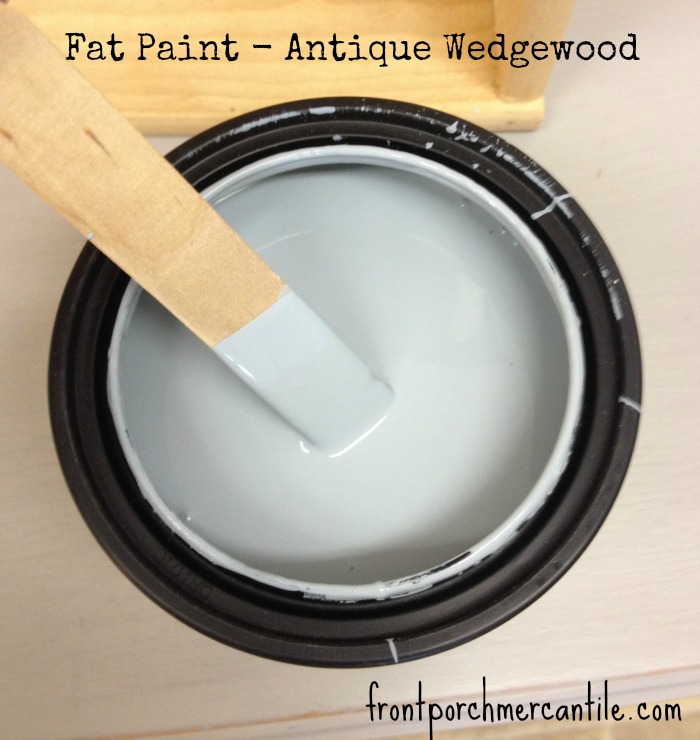
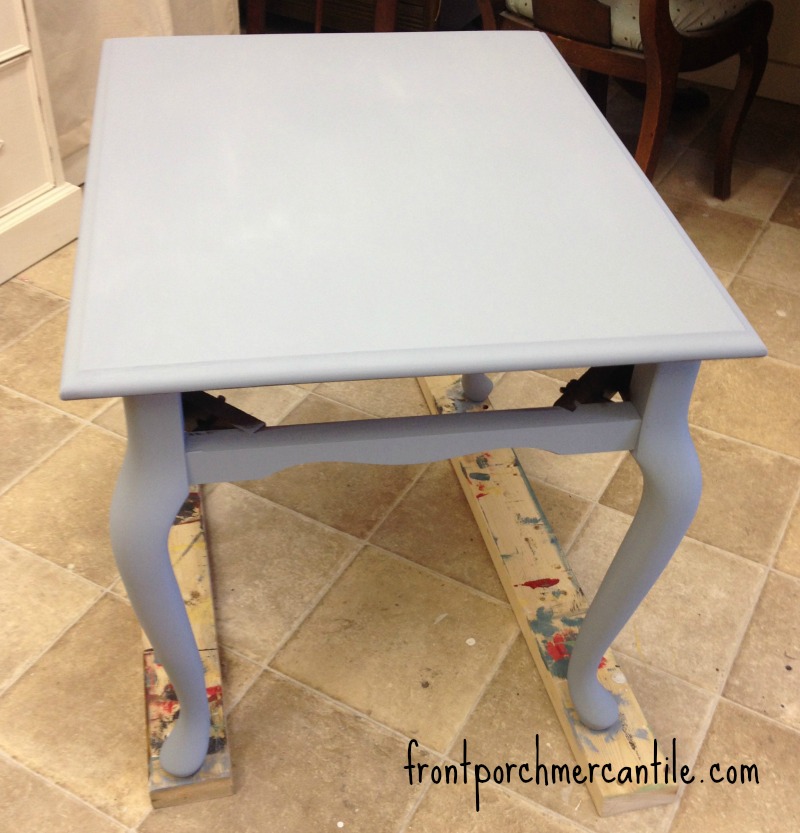
Now paint. Yup- open the can, give it a stir and just paint. See. Easy. No major fuss, no priming, no hassles. I chose Fat Paint’s Antique Wedgewood for this piece. Love this colour. No special brushes required, no fancy anything. If you have a good quality brush you are all set.
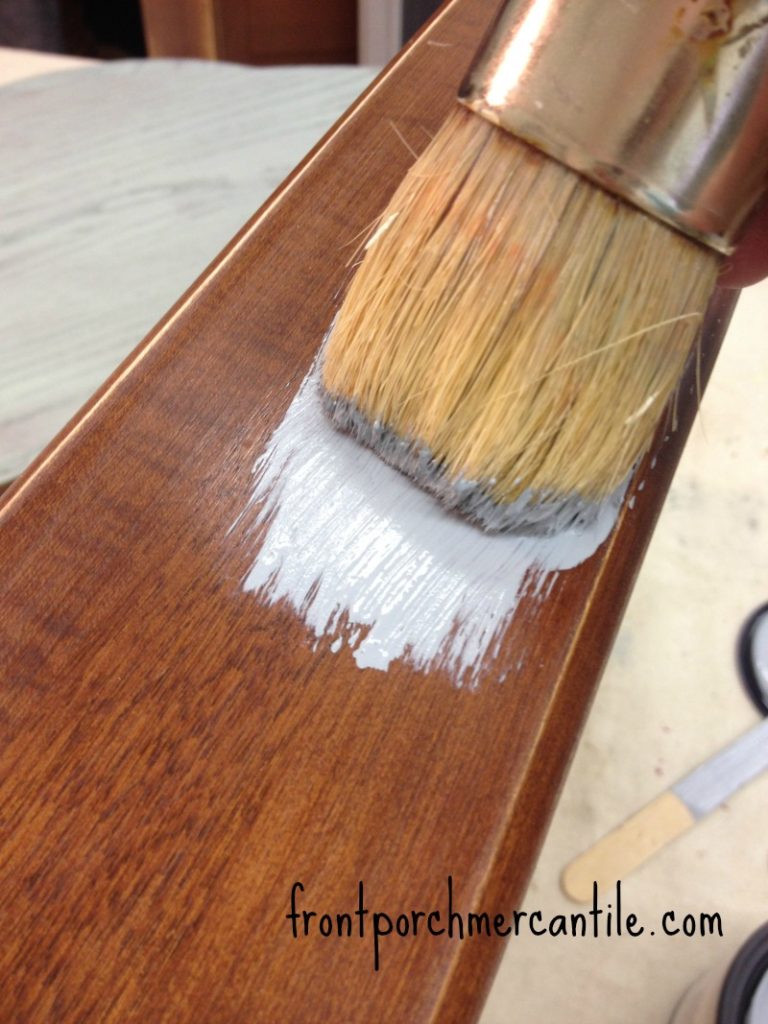
It took me about 15 mins to paint this piece, but I was gabbing with a friend, and may or may not have been sipping coffee and eating cookies too.
Step 4
Wait for your first coat to dry, this piece took about 20 mins to dry (but I was distracted by coffee, cookies and conversation so it may have been sooner) it usually takes 15-30 mins to dry depending on humidity, how thick you did your coats etc. It is a fast-drying paint!! You can recoat as soon as it is dry (another great thing for us impatient types)
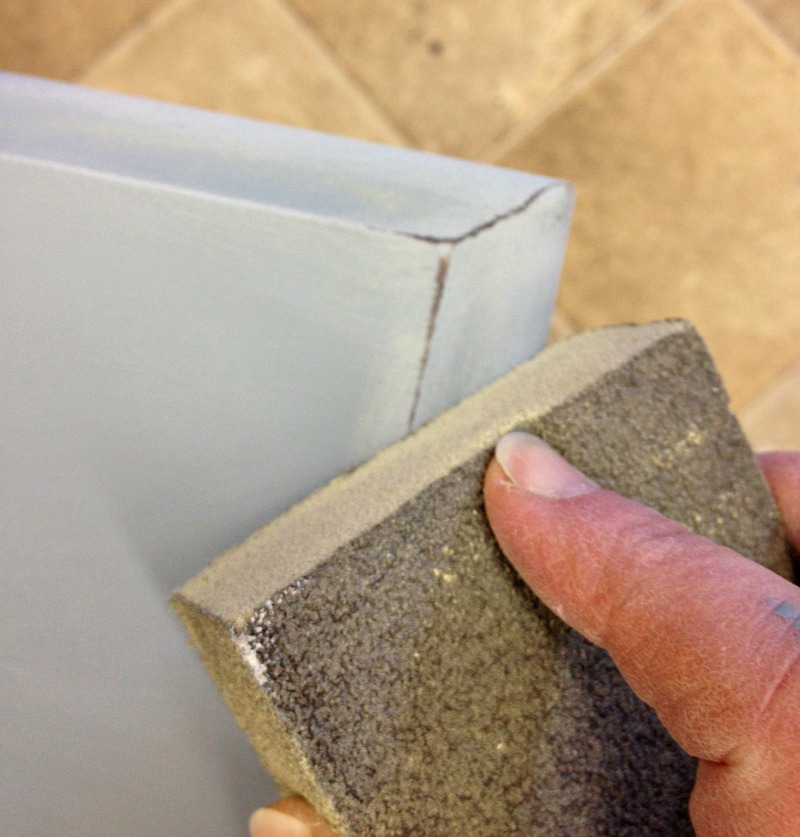
Step 5
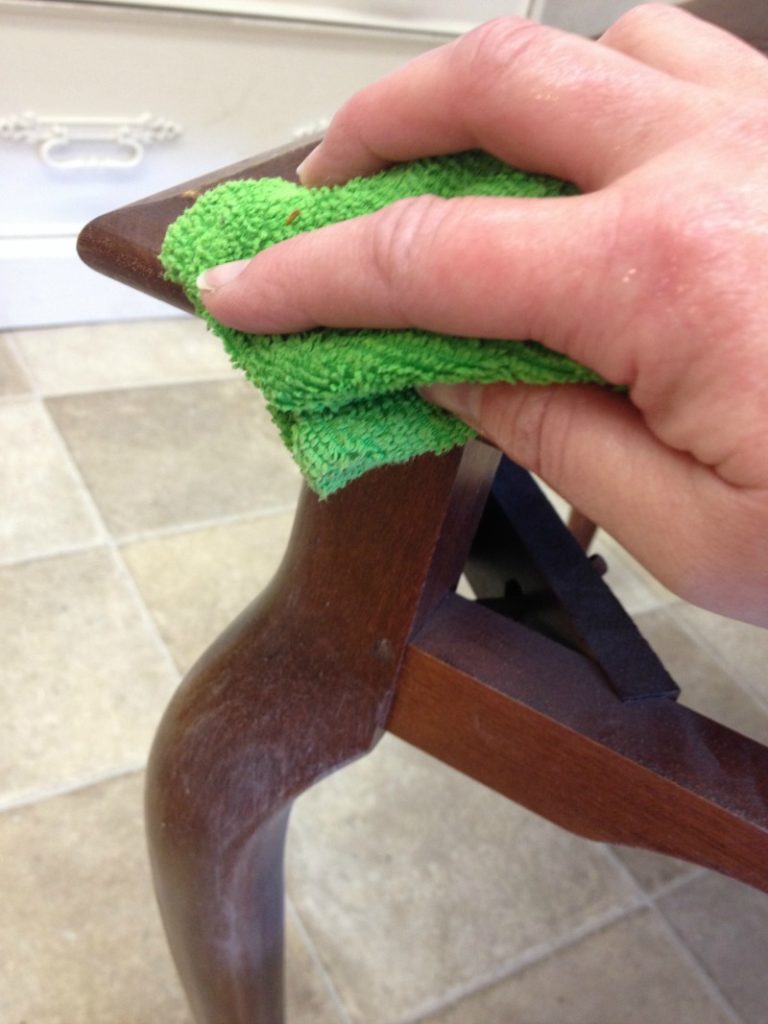
Distress if you want or leave as is, I wanted to distress this one just a wee bit. I use a sanding sponge and a light hand or heavy hand, depending on the look I want. Fat Paint distress so nicely and sands beautifully. Just love how easy it is to work with.
And look, here is another awesome shot of my super dry hands – it was a busy paint day what can I say but, um, sorry! (Maybe I need to get hand models here painting…hmm..) Sorry, I digress..back to sanding. Fun right?
Step 6
Top Coat – Fat Paint like all chalk paints require a top coat to protect it. There are several top coats we could use depending on the final look you would like. Fat Paint brand has a lovely Clear Wax and an Antique Wax, we can also use White Wax from the Miss Mustard Seed Milk Paint line or a poly topcoat. If you already have a wax or topcoat on your shelves at home, you can use that! There is no need to only use one company’s product on your furniture pieces, I mix and match all the time!
I happen to LOVE the Fat Wax, it’s all-natural, solvent-free and so easy to use. I finished this piece in Fat Wax, just rub it on using a wax brush or clean a lint-free rag, wipe off excess wax working in small sections. Let dry and buff to the desired sheen. I neglected to get any shots of the waxing, oops. I intended to paint the hardware but it fell apart – currently waiting for my hardware order to come in, too impatient to wait to post this – sorry.
See – I am totally impatient – that is why this is such a great paint to work with!
Told you. EASY PEASY.
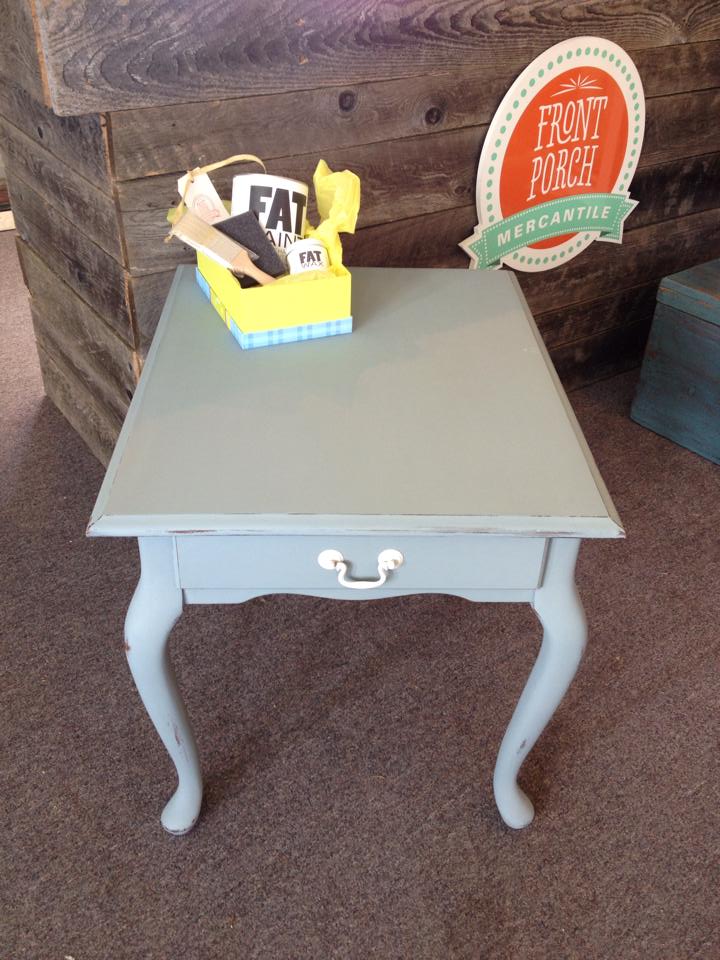
Here she is with her painted hardware (painted in Gull Grey)
If you want to see how we used a reclaimed bowling alley floor to make out counter, read more here!
Start to finish 1.5 hours including chatty time with my friend, a coffee and I worked on another piece as well while this was drying!! A complete transformation. We used VERY little paint (about 1/4 of a PINT) I think she is much prettier and fresher now. Restyled and ready for a new life. What do you think? Is there anything in your house that could use a little re-loving or refresher?
Fat Paint is affordable and available in quart sizes, pint-size and sample sizes. FAT Paint is low in volatile organic compounds (VOCs), odour-free and lead-free; totally safe for use around the kiddos and pets indoors and as all our paints are…it is MADE in CANADA (we are very proud about that)

Check out the colours and more information here.
Want to get your hands on some Fat Paint? Come see me at the shop and we can chat about your projects! (But I warn you…it is addictive) We also offer fun workshops.
Don’t live in my area, you can find it at retailers here.
Happy Painting!
Wendy
*This blog post was updated in September 2021. Front Porch Mercantile is no longer a physical retail store and has grown into Front Porch Lifestyle. Now Wendy offers her services as a business coach to other creatives while continuing a blog more focused on living a creative life.
OMG Wendy, I feel like perhaps you wrote this post for me!!! Thank you so much, I’ll be down to discuss soon!!
Julie
Love to see you Julie, come see me anytime!:)
Your blog design is so stinkin’ cute Wendy! Love it! Also, how do I get my hands on this Fat Paint? Will you ship to NL? So happy to see how your shop and your web site have come together…what a fun new career you’ve created over the past year!! ~Kerri
Hi Kerri, thanks!! I will ship to NL – just getting my online shop set up, but will ship you some if you would like, it works exactly the same as ASCP although I find it a bit smoother. I will pm you with some details tonight! Thanks, Wendy
Just wondering if you sell this online and ship to NS. I don’t see it on your online shop but thought maybe arrangements could be made. Thanks
Hi Jennifer, I don’t mail Fat Paint, but I can send it via bus if there is a bus depot nearby. Where are you located? :)
Thanks for this great tutorial for Fat Paint Wendy. It looks very easy to do. Have a great day!
Pam
When I compare the colour of this table to the paint colour chart, it looks like Bella Blue rather than Antique Wedgwood (or maybe you call it Wedgewood). Any tips for choosing a colour online?
Hi, it is hard to pick a colour online, I know. sometimes googling the colour, or searching on Pinterest help when picking the colour. Bella Blue us much softer and lighter than Antique Wedgwood, drop in the shop if you can, we have samples here for you to see. :)
I wish I could pop in, but I’m far, far from you. I’ll do some googling. Thank you.
Hi, I love the fat paint but haven’t tried the far wax. I used bees wax & loved it but I’m not sure how often it should be re-applied? I am now wanting to fat pain my dark wood dining table in a distressed warm white. I haven’t had much luck with varnathane so wonder if the fat wax would be ok for a high traffic use table (with kids!).
Hi, I love the fat paint but haven’t tried the fat wax. I used bees wax & loved it but I’m not sure how often it should be re-applied? I am now wanting to fat paint my dark wood dining table in a distressed warm white. I haven’t had much luck with varathane so wonder if the fat wax would be ok for a high traffic use table (with kids!).
Hi Linda, yes, you can definitely use FAT Wax on the table top. I would do 3 or 4 light coats (just on the top) to make it super strong. Remember it takes 21 days to fully cure as well. But you can use it in between just gently! Have fun painting!
How much time between distressing and waxing?
You can wax right away after distressing :)