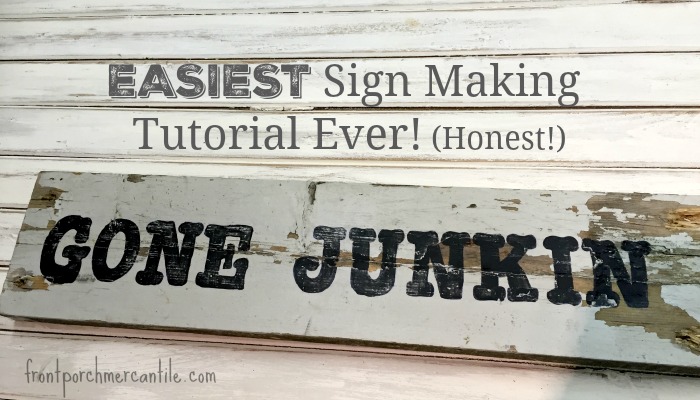
Easiest Sign Making Tutorial Ever
I recently made a rustic sign for a friend and had so many people ask me how it was made that I thought I would share my easy how to with you all. This really is the easiest sign making tutorial ever. Like the sign says – honest! You are going to be so happy…

I recently made a rustic sign for a friend and had so many people ask me how it was made that I thought I would share my easy how to with you all. This really is the easiest sign making tutorial ever. Like the sign says – honest!

You are going to be so happy with me. Seriously. You will want to send me flowers and candy. (kidding, sort of) This sign making method is so easy and super inexpensive. Win, win right?
Supplies needed are super simple too:
(There are some affiliate links in this list)
Any old board (or make your own using our tutorial here)
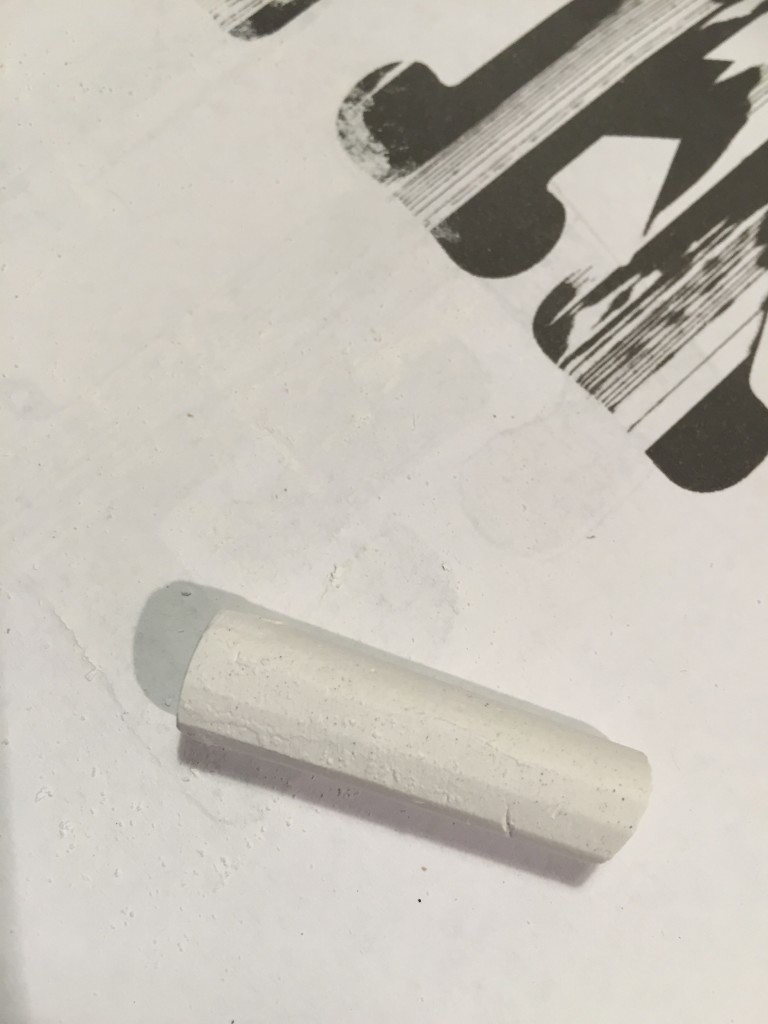
Chalk or carbon paper
A printer (this is my printer but any laser or ink jet printer will work)
Sharpie Marker (if using black paint)
Paint (I used FAT Paint)
Optional topcoat like FAT Clear or Patina Wax
Sanding sponge (I use these)
See, not even a lot of supplies are needed!
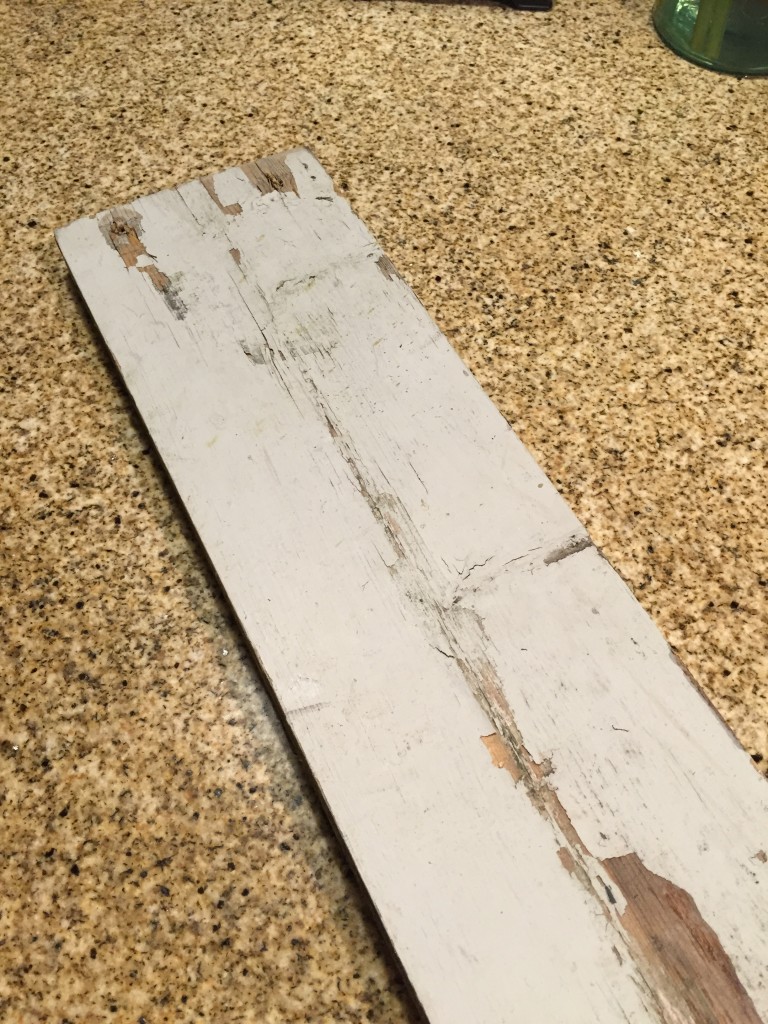
We started with this old board. Really. Just an old board.
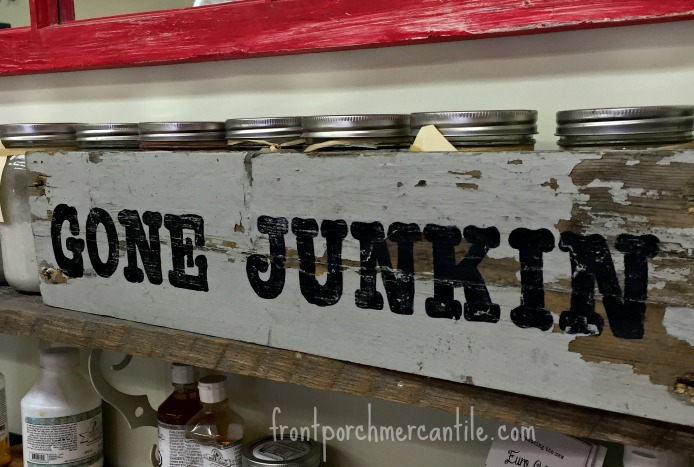
First thing you want to do is print up what ever saying you want. Choose your saying, pick your font and play with sizes so it will fit on your board. My “Gone Junkin” was sized at 300 and fit over 3 pages.
I usually grey scale or outline only for my font when I print so it doesn’t use as much ink as full black. (Just a tip) My printer was actually almost out of ink for this one so excuse the odd colouring. I just needed the outline so its A OK like this.
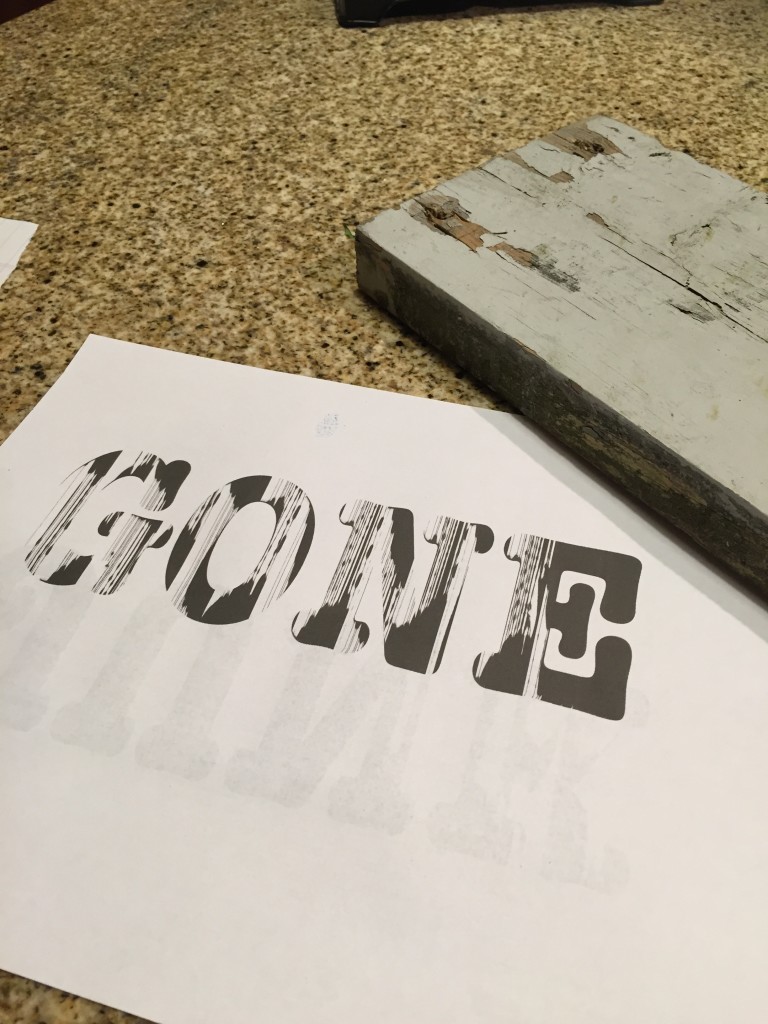
One you have your words printed out, lay them out on the board and tape the sheets together if you worried about sizing it and holding it just right together, I don’t usually bother, but I like to “wing it” a lot.
For this board I didn’t even scrape or clean the board (totally against everything I always tell my clients to do ha ha) I really wanted it to look rustic, so I was ok with it chipping and the paint not sticking every place.
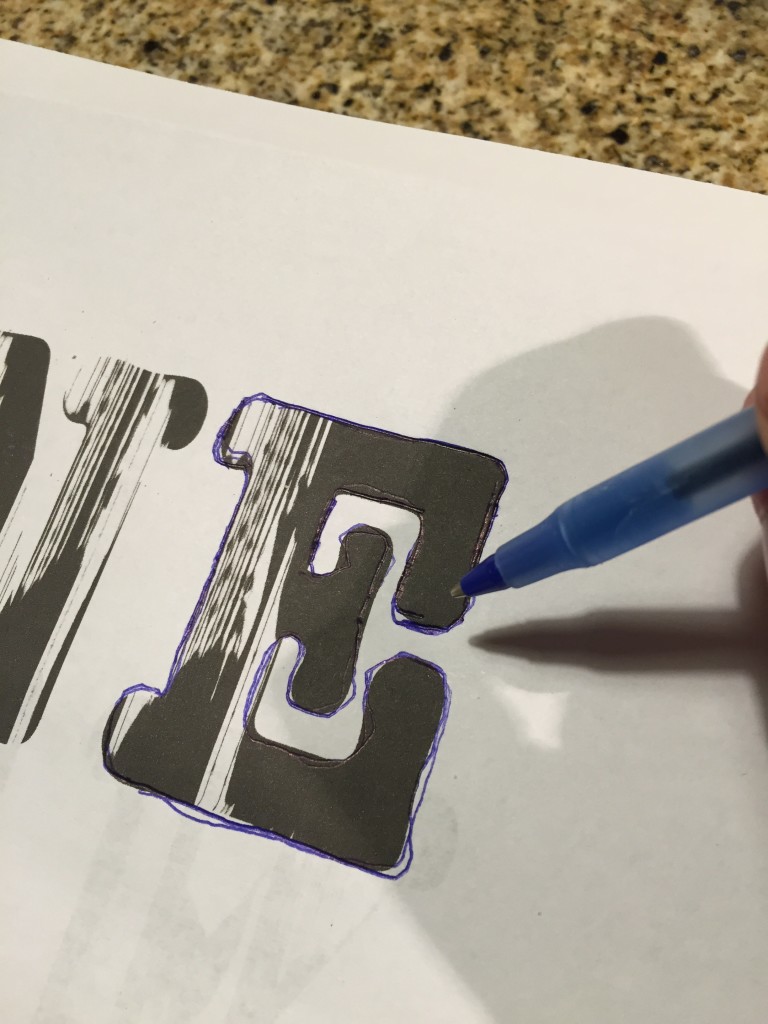
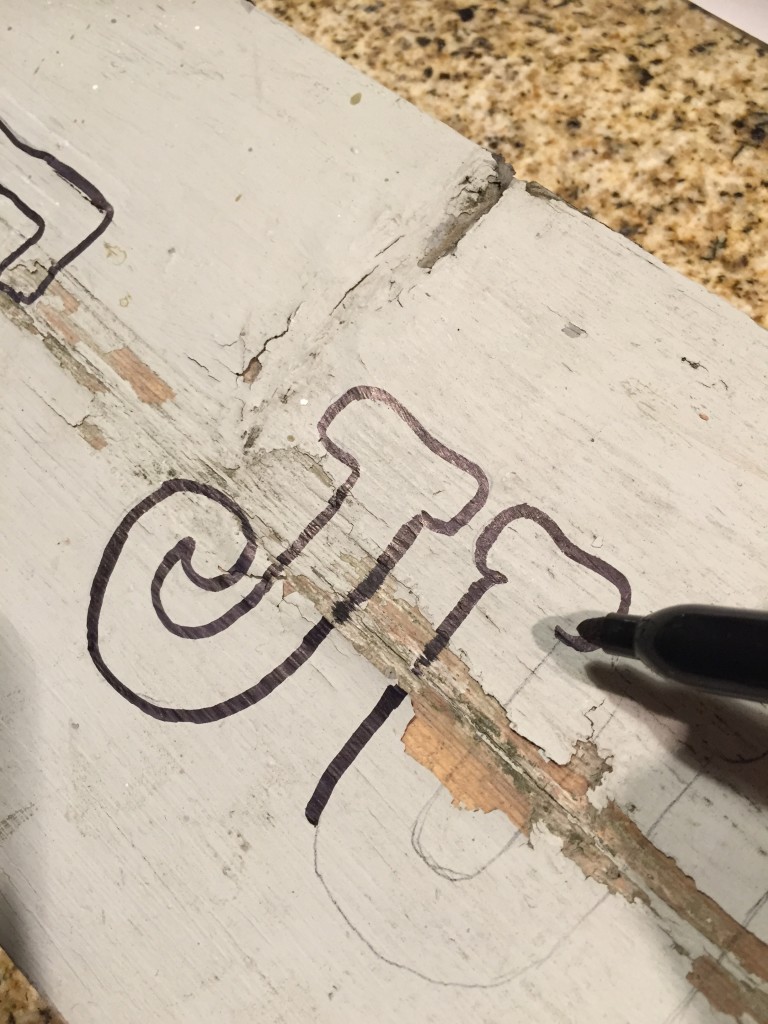
Place your printed sheet on the board with the carbon paper underneath. Trace out the letters.
 If you don’t have carbon paper you can use chalk, follow the method I used here in this tutorial.
Once you have all your words traced out, you can use a Sharpie Marker like I did, it makes filling in the black paint a little easier.
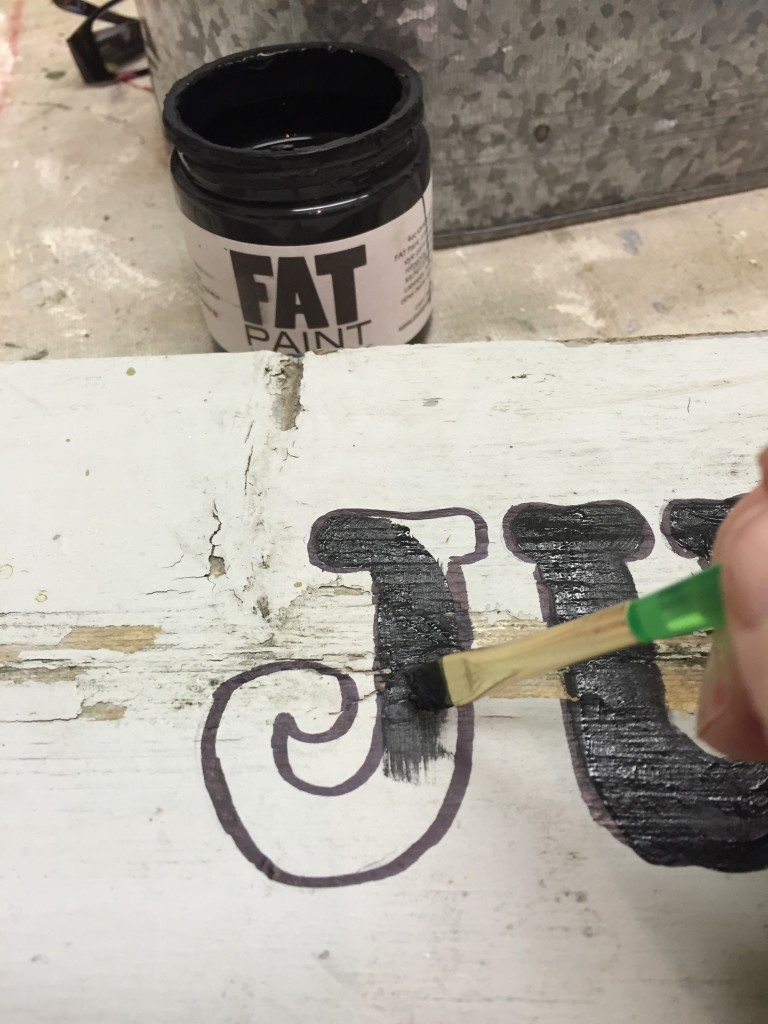
Then, simply use a small brush and fill in the details. Easy. Right?
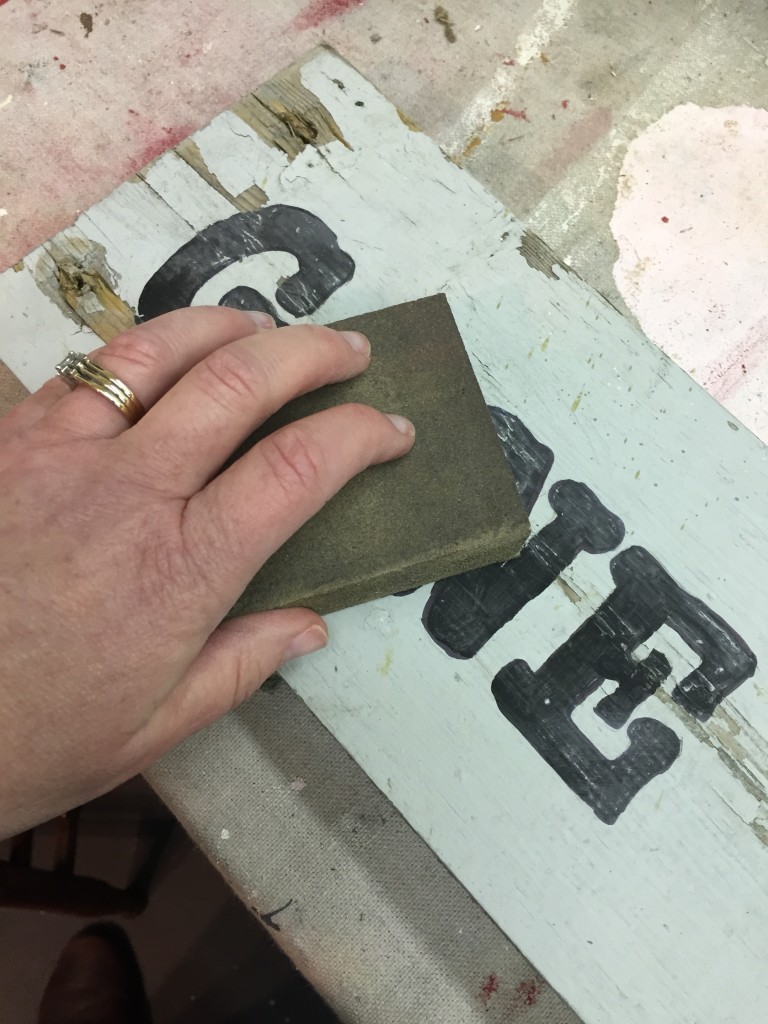
Once you have finished painting you can optionally sand it down to make it more rustic and add clear and/or dark waxes to highlight the wood, or you can just leave it. The awesome thing about this method is you can make ANY sign you want, its super easy. Right?
What sign will you make?
Send me a picture if you do up a sign, I’d love to see it! Really, I LOVE when you share your pictures with me!
Have a super fabulous day my friends, thanks for dropping in. Oh, and I just realized I just now told the person I gave the sign to that it was cheap and easy, ha ha, hope she will forgive me (although she is probably “gone junkin” with her buddies and may never know) ;)
Wendy
ps..have you joined out mailing list? Don’t miss a post sign up and stay in touch (thanks again for hanging out with me!)
Subscribe to our mailing list
It’s cool to see that sign making now days is becoming something that almost anyone can do. This really helps business owners and even sigh making companies mas produce signs for customers. This article has some great points on how this process is done and I can see how this could help people who are looking to make some signs.